Adopte un enfoque proactivo para el manejo de su jardín y paisaje
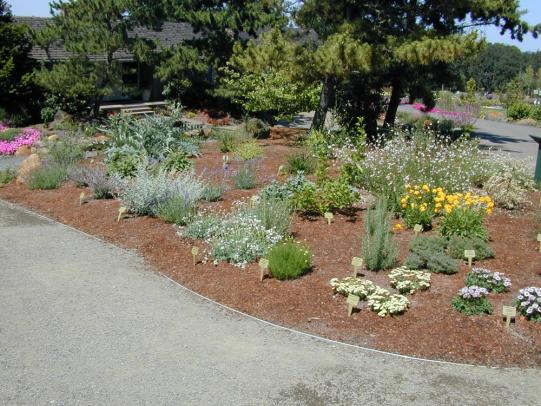
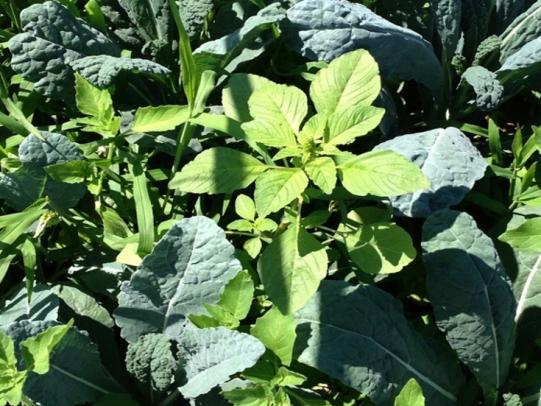
La foto muestra un jardín diverso con vegetales y flores con una diversidad de plantas que crecen juntas.
Muchas personas desean manejar las plantas de su jardín y paisaje utilizando métodos no químicos (sin pesticidas). Los pesticidas son productos diseñados para matar malezas, musgos, insectos, enfermedades de las plantas, babosas y roedores.
Acerca de los pesticidas orgánicos
- Orgánico no significa libre de pesticidas. Los pesticidas orgánicos están ampliamente disponibles.
- Los productos pesticidas orgánicos se derivan de fuentes vegetales, animales y minerales. Algunos ejemplos comunes incluyen aceite de neem, jabón insecticida, Bacillus thuringiensis (Bt) y aerosoles fungicidas de cobre.
- Los productos pesticidas orgánicos aún tienen riesgos. Lea y siga las instrucciones de la etiqueta para minimizar los riesgos y maximizar los beneficios.
- Para obtener más información, consulte Productos pesticidas orgánicos.
Ir a
- Planta adecuada, lugar adecuado, cuidado adecuado
- Preparación del suelo, plantación y cuidado
- Utilice barreras físicas y métodos prácticos
Vista general
- Las plantas de su jardín y paisaje son vulnerables a las plagas de insectos y enfermedades de las plantas.
- Las plantas sanas resisten las plagas y enfermedades. Las plantas estresadas son más propensas a sufrir problemas.
- Proporcione a las plantas las condiciones adecuadas para su crecimiento (suelo, luz solar, agua, fertilizante y poda).
- Excluya las plagas de las plantas vulnerables con mosquiteros, telas para cubrir las hileras, cercas, redes y otros métodos.
Claves para el éxito
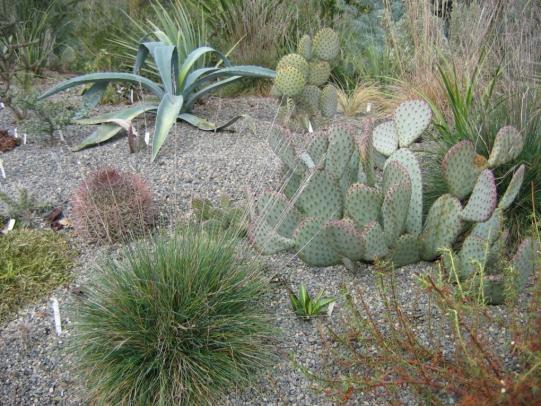
- Elija plantas que se adapten a su zona de rusticidad y a las condiciones de cultivo.
- Elija plantas que sean resistentes a las plagas y enfermedades relevantes para su zona.
- Plante plantas sanas. Bríndeles el cuidado adecuado, que incluya la preparación del suelo, el fertilizante, el agua y la poda.
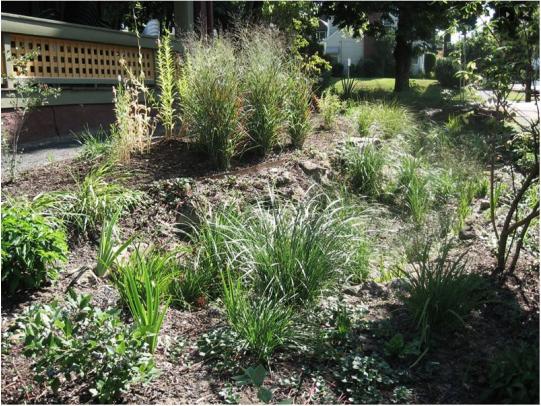
- Cultive varios tipos de plantas juntas. Una diversidad de plantas reduce el impacto de plagas y enfermedades.
- Esté atento a las plagas de insectos y enfermedades de las plantas. Trate de evitarlas antes de que se conviertan en problemas mayores.
- Fomente la vida silvestre, como las aves, y los insectos beneficiosos, como las mariquitas. Estos depredadores se alimentan de insectos dañinos, como los pulgones.
Elija plantas adecuadas para las condiciones de su lugar de trabajo. Instálelas en un suelo óptimo y en condiciones óptimas de luz solar. Dé a sus plantas el cuidado que necesitan a lo largo del tiempo.
PLANIFIQUE ANTES DE PLANTAR
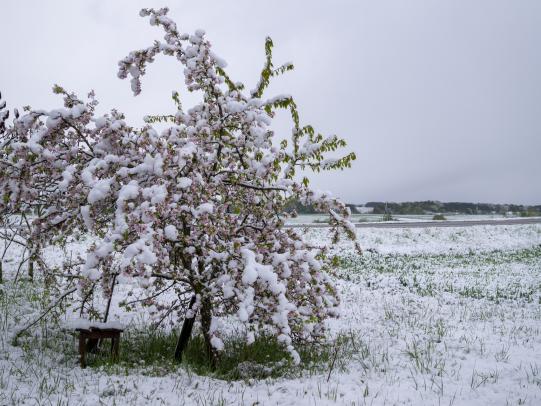
- Elija plantas que puedan sobrevivir a las bajas temperaturas del invierno en el lugar donde vive. Adapte la clasificación de resistencia al frío de sus plantas a su lugar de trabajo.
- Ubique las plantas en lugares que proporcionen la cantidad adecuada de luz solar para sus necesidades.
- Instale las plantas en lugares con condiciones de drenaje del suelo que favorezcan el crecimiento de las raíces de las plantas.
- Los arándanos, los cultivos de hortalizas y muchas plantas ornamentales son sensibles al pH. Requieren el pH del suelo adecuado para prosperar. Pruebe el pH del suelo antes de instalar las plantas. Ajuste el pH del suelo para satisfacer las necesidades de las plantas que cultivará.
ELIJA PLANTAS QUE RESISTAN AL FRÍO EN SU ZONA; espere condiciones climáticas aberrantes
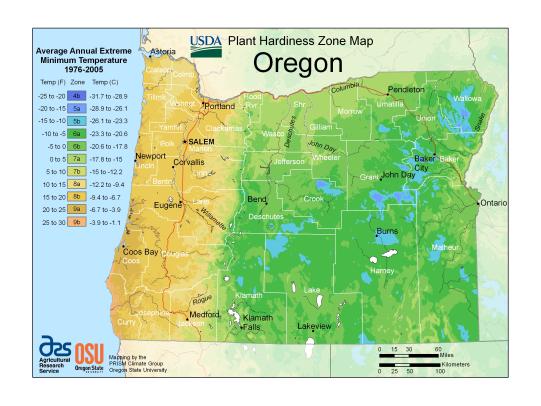
Agricultural Research Service, Oregon State University
NetPix, iStock
COLOQUE LAS PLANTAS EN EL LUGAR ADECUADO PARA QUE RECIBAN LA LUZ SOLAR
Los distintos tipos de plantas tienen distintas necesidades de luz solar.
- Determine las necesidades de luz solar de las plantas que desea cultivar. Revise la etiqueta de la planta o consulte al personal del vivero. O busque las necesidades de luz solar de las plantas en libros como Sunset Western Garden Book (Sunset Publishing Corporation).
- Luego, piense en la luz solar necesaria en el contexto de su ubicación en el noroeste del Pacífico. Por ejemplo, ¿su lugar de trabajo está en la costa, en las montañas o en áreas cálidas del interior?
- Coloque las plantas en lugares que proporcionen la cantidad adecuada de luz solar según su lugar de trabajo y el entorno regional.
Signe Danler, Oregon State University
Signe Danler, Oregon State University
Weston Miller, Oregon State University
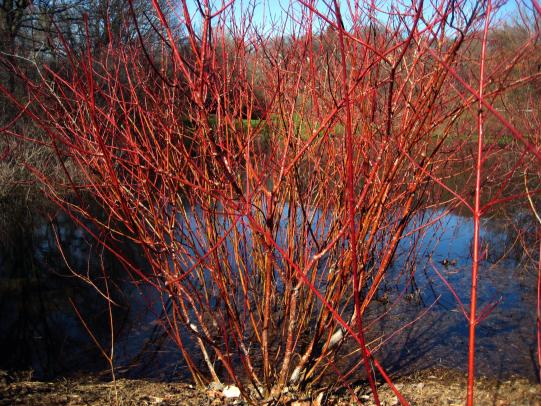
ADAPTA LAS PLANTAS A LAS CONDICIONES DE DRENAJE DEL SUELO QUE PREFIERAN
- El drenaje del suelo se refiere a cómo el agua se mueve a través del suelo y hacia afuera debido a la gravedad.
- El drenaje del suelo está determinado por el tamaño de los poros y la textura del suelo (proporción de arena, limo y arcilla), la profundidad del suelo y la pendiente del área. El agua se mueve más rápidamente a través de suelos arenosos en comparación con los suelos arcillosos.
- Los diferentes tipos de plantas requieren condiciones específicas de drenaje del suelo para prosperar.
- Si tienes un área con drenaje lento, elige plantas que toleren condiciones de suelo húmedo.
- Mejora el drenaje del suelo si quieres cultivar plantas que requieran condiciones de buen drenaje.
Neil Bell, Oregon State University
"Red Twig Dogwood (Cornus Sericea)" by cataloft is licensed under CC BY-NC-SA 2.0.
East Multnomah Soil and Water Conservation District
Neil Bell, Oregon State University
Neil Bell, Oregon State University
AJUSTE EL pH DEL SUELO ANTES DE PLANTAR Y MANTÉNGALO
- Pruebe el pH del suelo antes de invertir en plantas para su jardín o paisaje.
- Consulte ¿Cómo pruebo el suelo de mi jardín? (OSU Extension Service) para obtener más información.
- Los arándanos, los cultivos de hortalizas y muchas plantas ornamentales requieren un rango de pH del suelo específico y estrecho para prosperar. Corrija el suelo según sea necesario para su planta.
- Los cultivos de hortalizas crecen mejor en suelos con un rango de pH de 6,0 a 7,0.
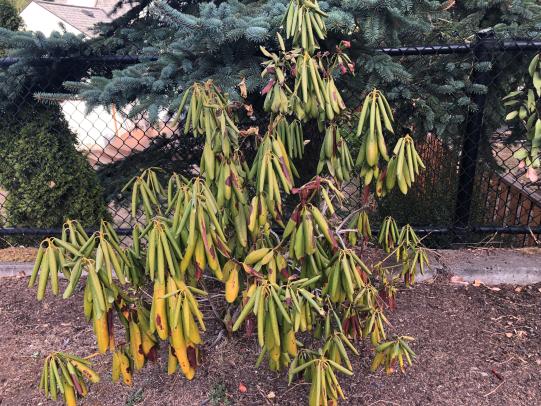
- Los arándanos y los rododendros prosperan en suelos con un rango de pH de 4,0 a 5,5.
- Ajuste el pH del suelo según sea necesario. Siga las recomendaciones de la prueba de suelo (si está disponible). Utilice la Guía de interpretación de pruebas de suelo (OSU Extension Service) para determinar las tasas de aplicación.
- Utilice cal agrícola o cal dolomítica para aumentar el pH del suelo.
- Utilice azufre elemental para reducir el pH del suelo.
- Agregue estos aditivos antes de plantar. Si los modifica con anticipación, los materiales tendrán tiempo de cambiar el pH del suelo antes de plantar.
- Si cultiva plantas sensibles al pH, controle regularmente el pH del suelo. Agregue cal o azufre según sea necesario para mantener el pH óptimo del suelo.
- Las plantas cultivadas en un suelo con el pH correcto no tendrán deficiencias de nutrientes relacionadas con el pH. También serán menos propensas a sufrir daños por insectos y enfermedades.
John Hartman, University of Kentucky, Bugwood.org
Brenda Kennedy, University of Kentucky, Bugwood.org
Más información sobre el pH del suelo y la cal
- Las hortalizas anuales crecen mejor en suelos con un pH de 6,0 a 7,0.
- Cuando el pH del suelo está fuera de este rango, los cultivos de hortalizas no prosperan.
- Añadir cal a un suelo ácido ayuda a aumentar el pH del suelo y la absorción de nutrientes por parte de los tomates. La cal también aporta calcio.
- Añadir cal antes de plantar tomates y cultivos similares.
- El otoño es el mejor momento para aplicar cal. La cal tarda un tiempo en cambiar el pH del suelo.
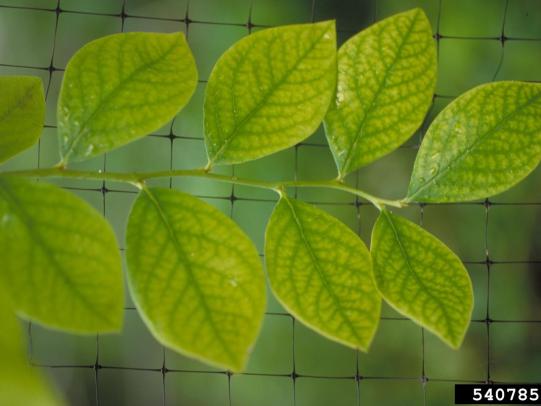
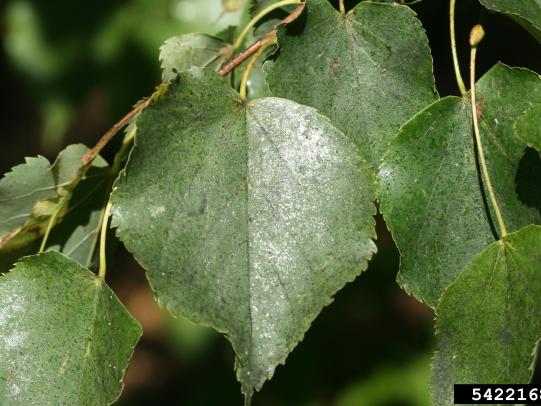
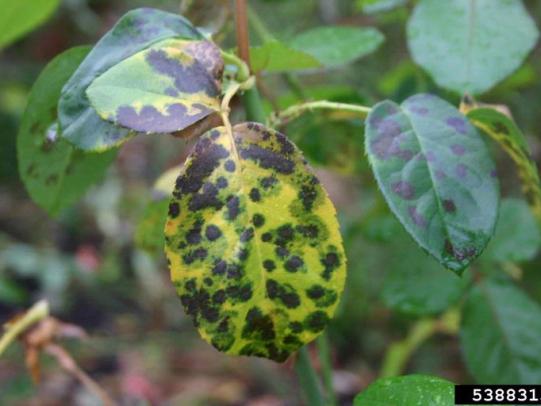
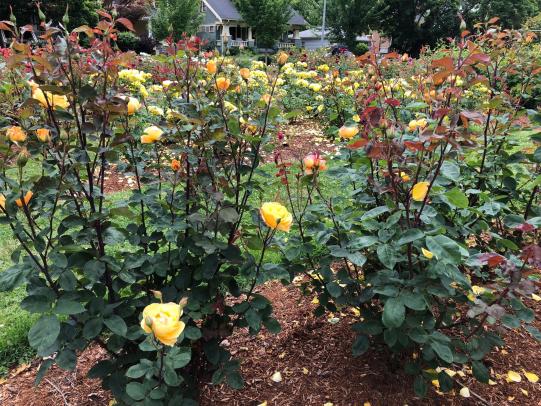
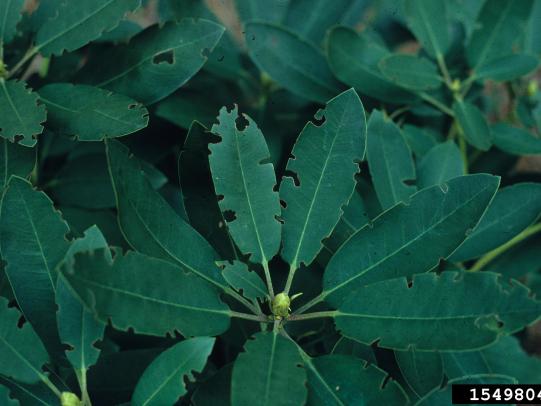
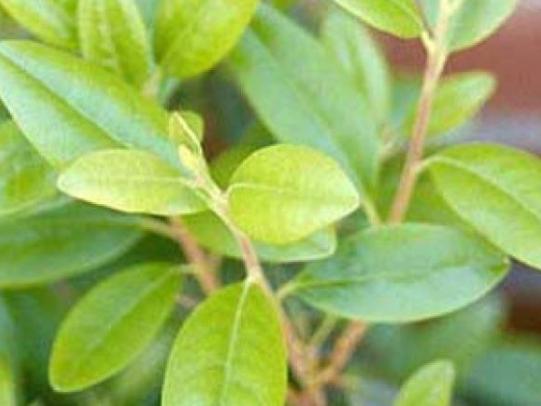
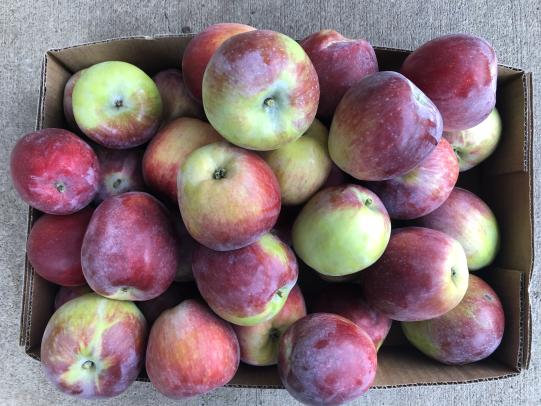
SELECCIONE PLANTAS RESISTENTES A LAS PLAGAS Y ENFERMEDADES
- Elija variedades de plantas que sean resistentes a las plagas y enfermedades locales. Puede evitar la pérdida de plantas eligiendo variedades resistentes a las plagas y enfermedades de las plantas deseadas.
- Busque variedades de rosas, rododendros y manzanos resistentes a las plagas y enfermedades.
Whitney Cranshaw, Colorado State University, Whitney Cranshaw, Colorado State University, Bugwood.org
William Fountain, University of Kentucky, William Fountain, University of Kentucky, Bugwood.org
Weston Miller, Oregon State University
Jim Baker, North Carolina State University, Bugwood.org
OSU Department of Horticulture Landscape Plants © Oregon State University, 1999-2015
Bruce Watt, University of Maine, Bugwood.org
Weston Miller, Oregon State University
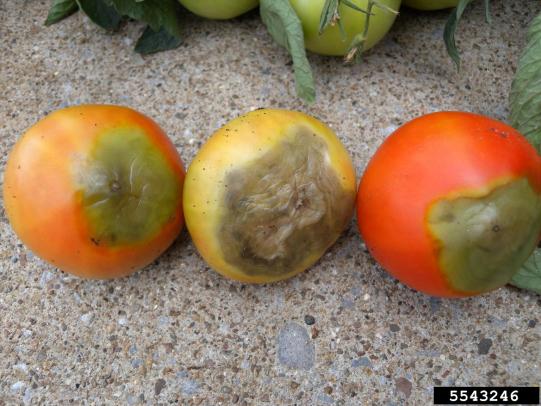
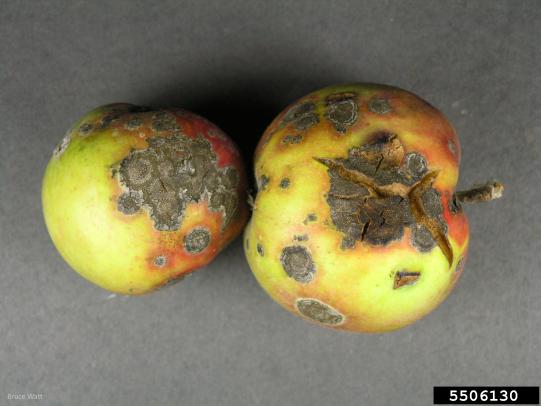
Más sobre la sarna del manzano
- Las primaveras húmedas que se dan en las zonas al oeste de la cordillera Cascade promueven enfermedades de las plantas como la sarna del manzano.
- Cultivar variedades de manzanas propensas a la sarna es un desafío en estas zonas. Se necesitan tratamientos con fungicidas para cultivar manzanas de calidad para las variedades que son susceptibles a la sarna en estas zonas.
- Evite la sarna del manzano eligiendo variedades resistentes. Consulte Susceptibilidad de las variedades de manzanos (PNW Plant Disease Management Handbook).
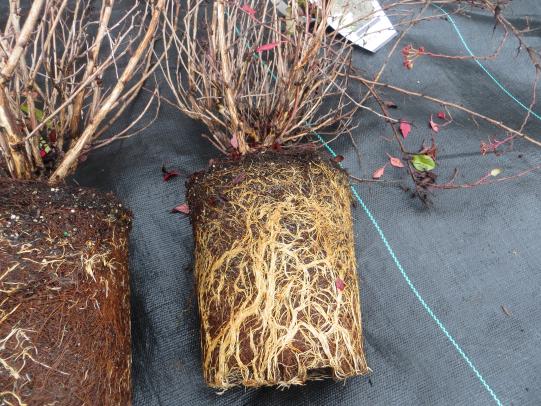
SELECCIONE PLANTAS SALUDABLES
- Inspeccione las plantas antes de comprarlas.
- Asegúrese de que el follaje, los tallos y las raíces no estén dañados.
- Revise si hay insectos, enfermedades y malezas.
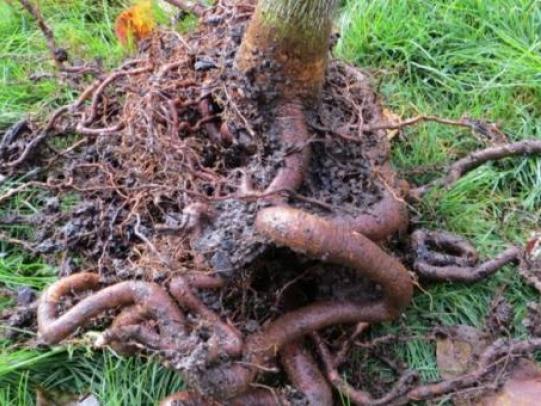
- Observe las raíces de las plantas cultivadas en contenedores, cuando sea posible. ¿La planta tiene raíces enredadas?
- Las plantas saludables en su jardín y paisaje son menos propensas a sufrir daños por plagas de insectos y enfermedades.
Signe Danler, Oregon State University
Signe Danler, Oregon State University
Weston Miller, Oregon State University
Qué hacer con las plantas con raíces enredadas
- En el caso de las plantas perennes con raíces enredadas, marque las raíces y sepárelas antes de plantarlas.
- Después de marcar y separar las raíces, pode los tallos y las hojas para que coincidan aproximadamente con la cantidad de raíces no dañadas.
- Estos pasos ayudan a que las raíces crezcan en el suelo del lugar de trabajo.
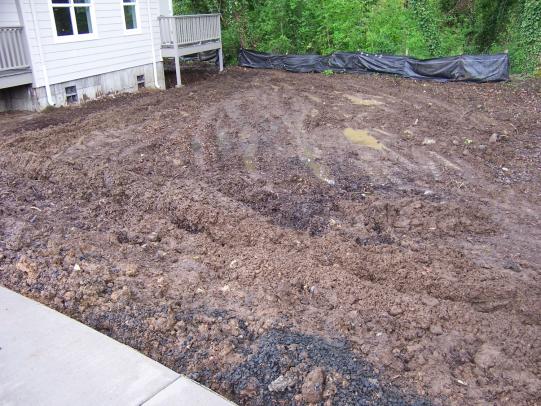
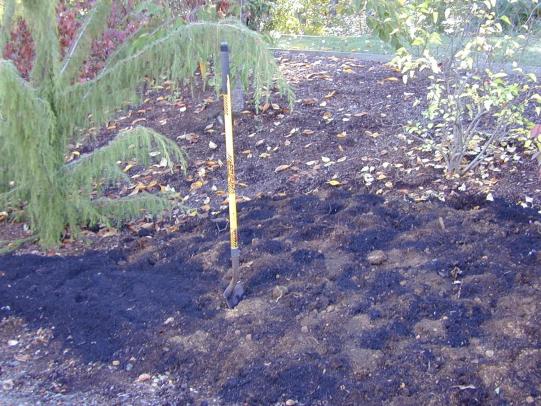
PREPARACIÓN DEL SUELO PARA LA PLANTACIÓN
- La planificación y la acción garantizarán el establecimiento exitoso de las plantas en las nuevas áreas de su jardín.
- Agregue y mezcle abono y enmiendas en el suelo antes de instalar las plantas del jardín.
- Extienda de 3 a 4 pulgadas de abono en el área que desea plantar.
- Mézclelo lo más profundamente posible con un tenedor o una pala. O use un motocultor para mezclar el abono con el suelo.
- Luego, cave hoyos. Instale las plantas en el suelo enmendado.
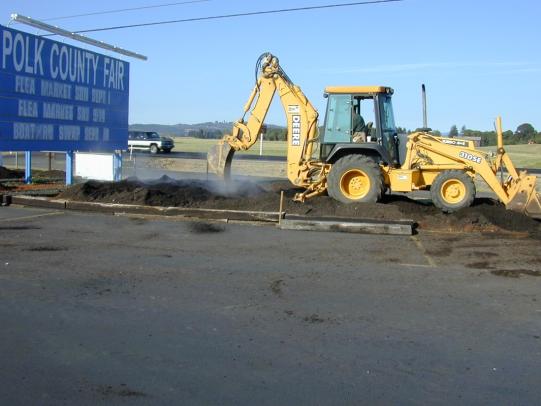
Antes de cavar, comuníquese con el servicio de localización de servicios públicos local
Para áreas grandes o suelo compactado, considere usar equipo pesado para preparar el sitio. Antes de excavar, comuníquese con el 8-1-1 de Oregón o con Notificación de servicios públicos de Washington o con la agencia de localización de servicios públicos de su estado.
Neil Bell, Oregon State University
Neil Bell, Oregon State University
Detailed instructions How to Plant Trees & Shrubs
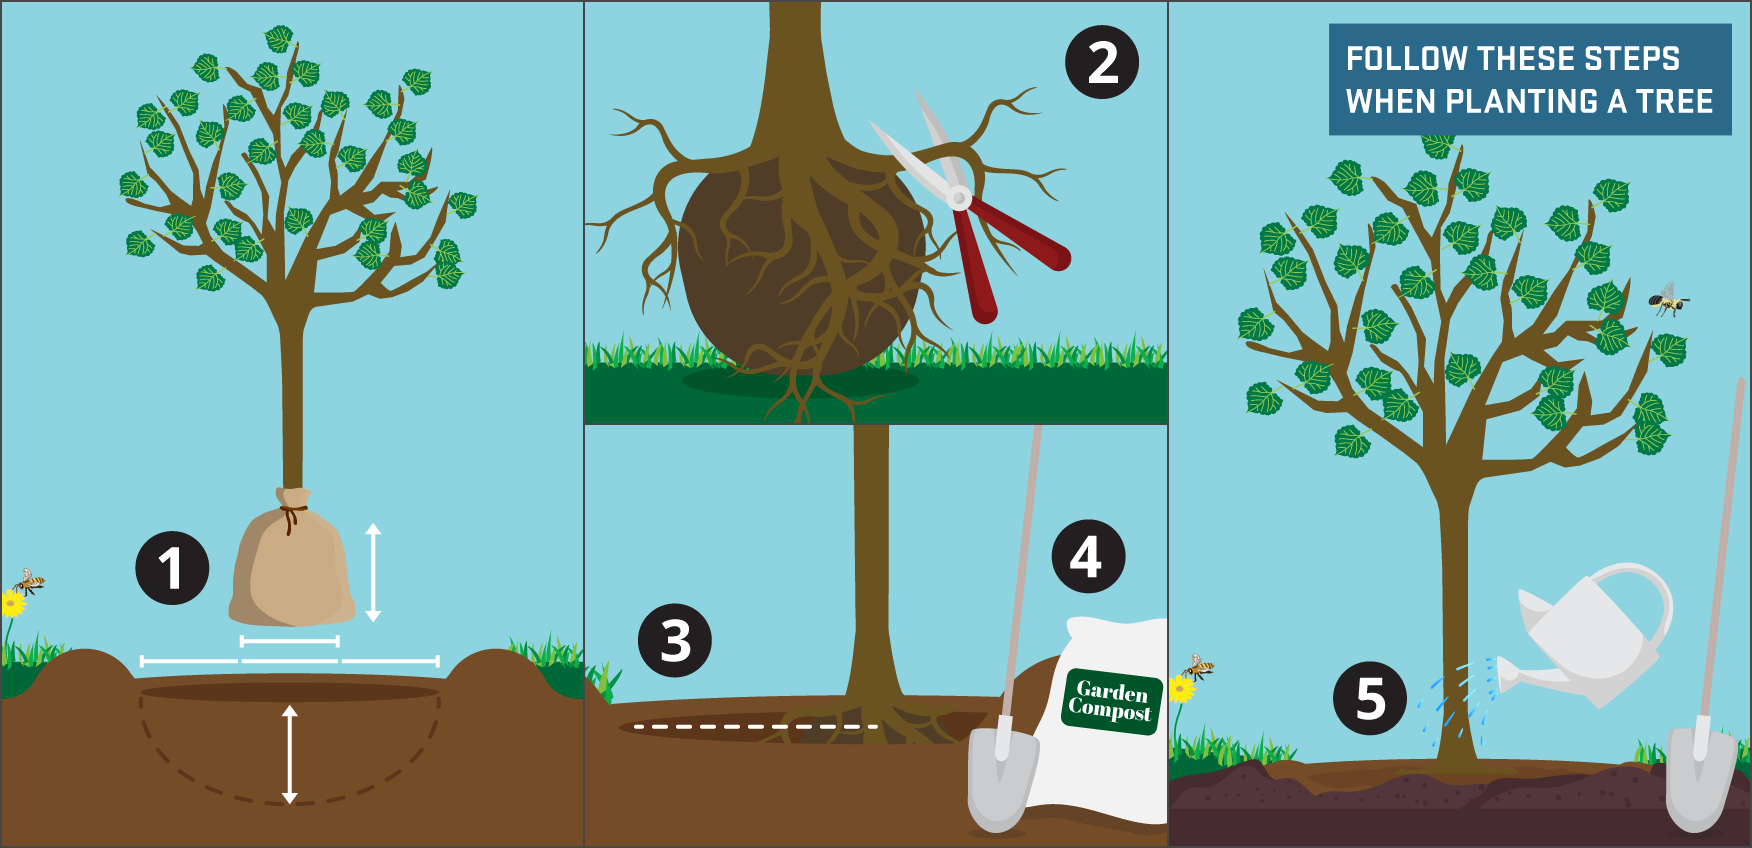
Follow these stems when planting a tree:
- Dig a hole 2–3 times the diameter of the root ball. It should be no deeper than the height of the root ball.
- Loosen or cut any circling or upward-growing roots. These roots cause poor growth. While planting, remove excess potting soil to expose the root system.
- Place the tree or shrub in the hole so the tops of the roots are slightly above soil level. For grafted trees, make sure the graft junction is at least 1 inch above the soil line.
- Amend the dug-out soil with compost and other amendments as needed. Fill the hole with the amended soil. Don’t fill the planting hole with pure compost or potting soil.
- Water the roots in thoroughly. Place mulch over the root zone, but not piled against the trunk.
Avoid planting root bound plants as shown below.
Signe Danler, Oregon State University
PROPORCIONE A SUS PLANTAS EL CUIDADO ADECUADO
- Proporcione a las plantas suficiente agua.
- Use fertilizantes N-P-K u otros para proporcionar nutrientes a las plantas según sea necesario.
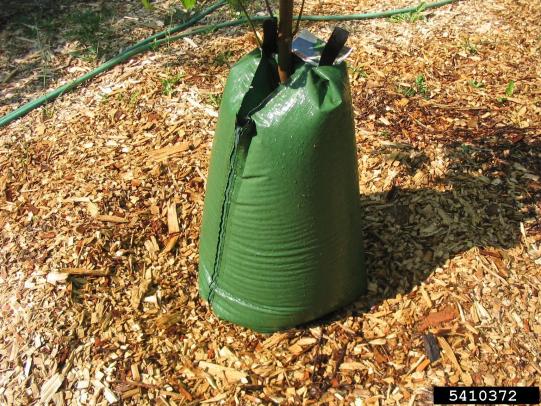
- Use mantillo para ayudar a conservar el agua y evitar que crezcan nuevas malezas.
PROPORCIONE AGUA SEGÚN SEA NECESARIO SEGÚN LA ESTACIÓN
- Las plantas afectadas por la sequía son propensas a problemas de plagas y enfermedades.
- Proporcione a sus plantas el agua que necesitan para crecer adecuadamente.
- Riegue las plantas profundamente para estimular sistemas de raíces fuertes. No aplique demasiada agua. El suelo empapado puede provocar enfermedades de pudrición de la raíz.
Weston Miller, Oregon State University
Joe Murray, Treebio.com, Bugwood.org
Weston Miller, Oregon State University
PROPORCIONE FERTILIZANTE SEGÚN SEA NECESARIO
- Las plantas necesitan una cantidad suficiente de cada nutriente esencial para prosperar.
- Las verduras, los arándanos, las fresas y otros cultivos requieren un manejo cuidadoso de los nutrientes.
- Realice un análisis del suelo antes de plantar cultivos e identifique las deficiencias específicas de nutrientes. Agregue nitrógeno, fósforo y potasio o fertilizantes y enmiendas del suelo según sea necesario. Consulte ¿Cómo analizo el suelo de mi jardín? (OSU Extension Service) para obtener más información.
- Para obtener más información sobre la fertilización del césped, consulte Cuidado práctico del césped para el oeste de Oregón y Calendario de mantenimiento del césped para el centro de Oregón (Servicio de extensión de OSU).
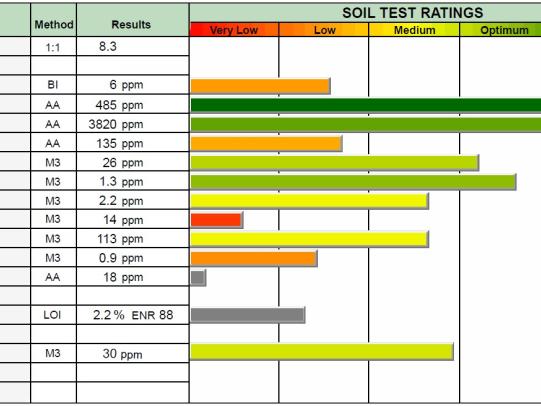
Waypoint Analytical Labs
OSU Turfgrass Management Program
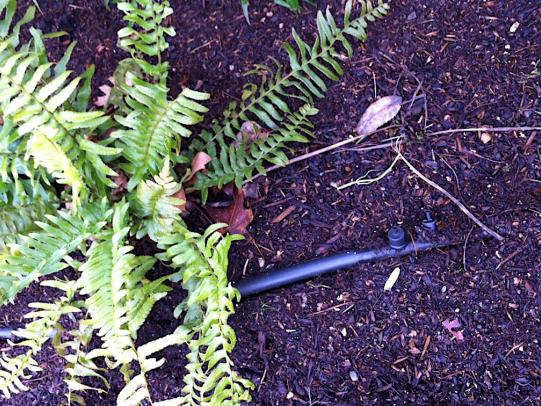
USE MANTILLO PARA CONSERVAR AGUA Y SUPRIMIR LAS MALEZAS
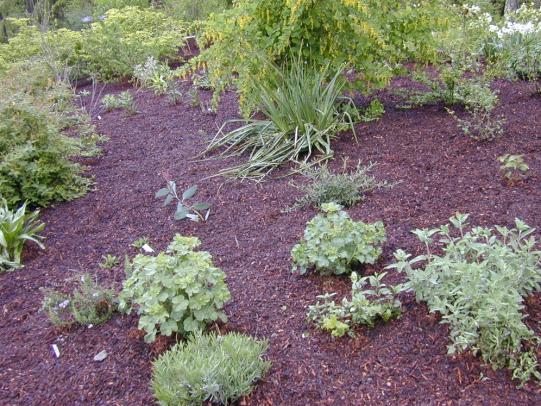
Neil Bell, Oregon State University
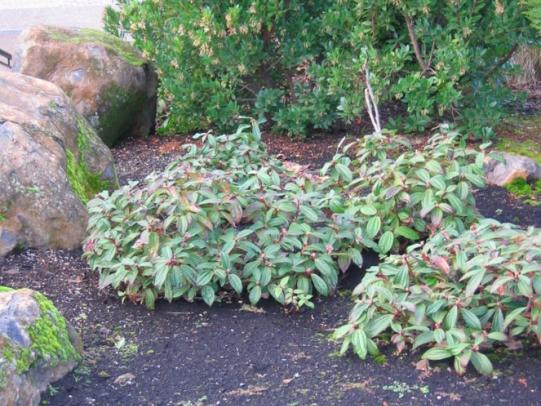
Neil Bell, Oregon State University
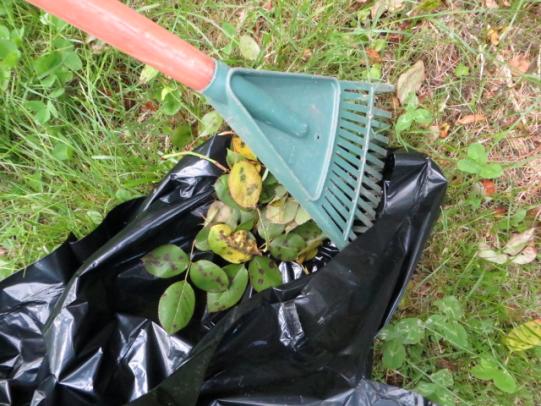
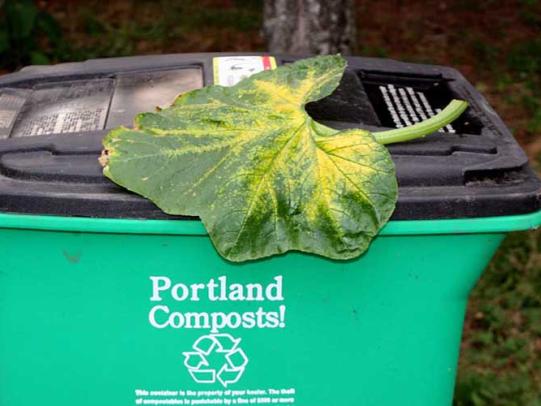
UTILICE MÉTODOS DE SANEAMIENTO
- Pode o deseche las plantas dañadas por plagas y enfermedades.
- Elimine las malas hierbas que crecen alrededor de las plantas que desea cultivar.
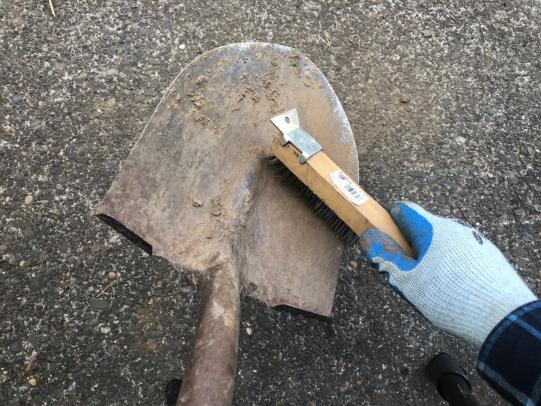
- Mantenga limpias sus herramientas. Desinfecte después de podar las plantas enfermas según sea necesario.
- Utilice la rotación de cultivos en huertos y huertos frutales para evitar la acumulación de plagas y enfermedades transmitidas por el suelo.
BUENOS MÉTODOS DE HIGIENE PARA PLANTAS CON PROBLEMAS DE PLAGAS Y ENFERMEDADES
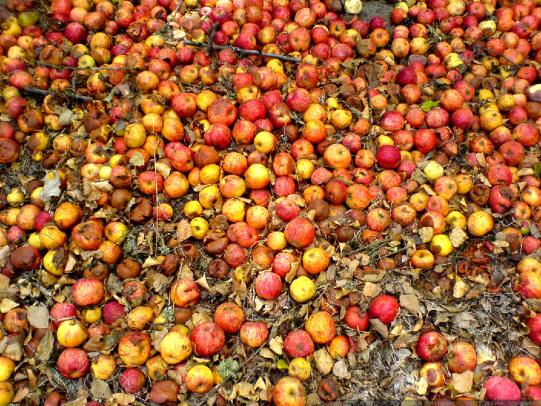
"fallen apples in willamette falls - DSC00292" by sean dreilinger is licensed under CC BY-NC-SA 2.0.
Signe Danler, Oregon State University
Weston Miller, Oregon State University
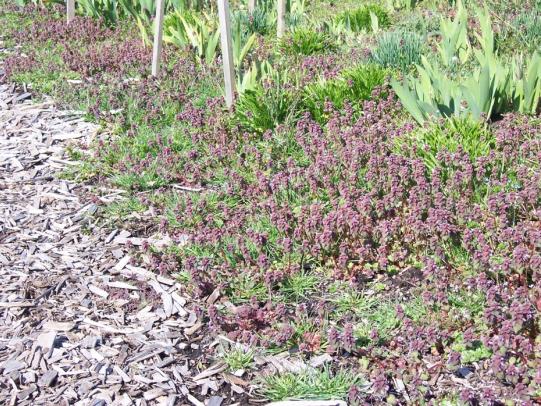
CONTROLAR LAS MALEZAS ALREDEDOR DE LAS PLANTAS DESEADAS
Jen Aron, Oregon State University
Neil Bell, Oregon State University
MANTENGA SUS HERRAMIENTAS LIMPIAS

Signe Danler, Oregon State University
Weston Miller, Oregon State University
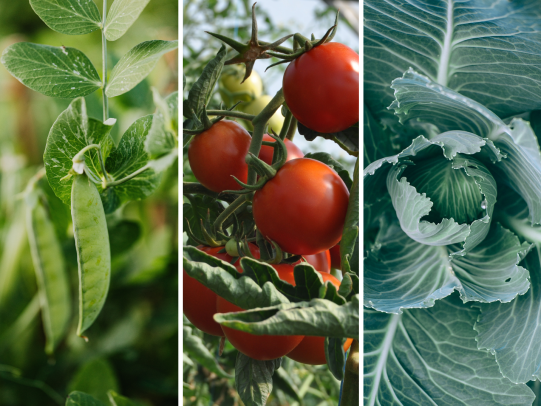
ROTACIÓN DE CULTIVOS PARA HUERTOS
iStock (cropped)
Más información sobre la rotación de cultivos
- Cultivar hortalizas repetidamente en el mismo espacio provocará problemas de plagas y enfermedades.
- Rotar los cultivos de hortalizas. Cultivar plantas que comparten enfermedades en diferentes lugares cada año.
- Este método evita la acumulación de plagas y enfermedades transmitidas por el suelo.
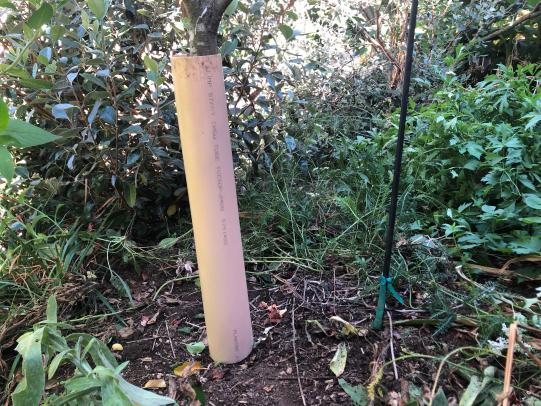
- Utilice barreras para mantener las plagas alejadas de las plantas deseadas.
- Detecte las plagas y enfermedades a tiempo, antes de que los problemas empeoren.
BARRERAS PARA PROTEGER LAS PLANTAS
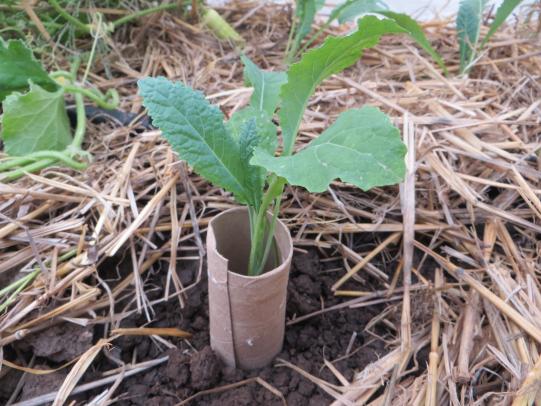
Signe Danler, Oregon State University
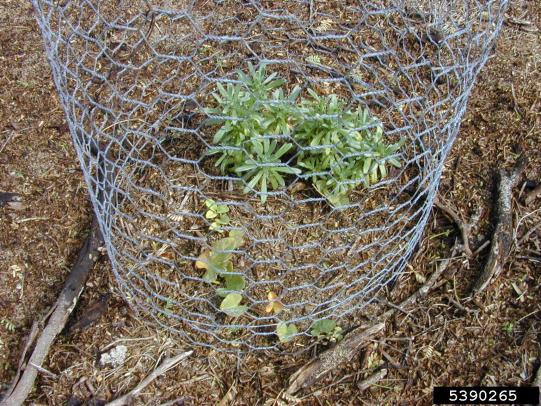
Forest and Kim Starr, Starr Environmental, Bugwood.org
Signe Danler, Oregon State University
Weston Miller, Oregon State University
Monica Maggio, Core Home Fruit
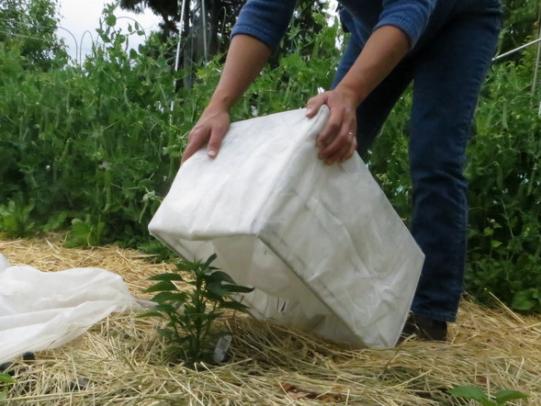
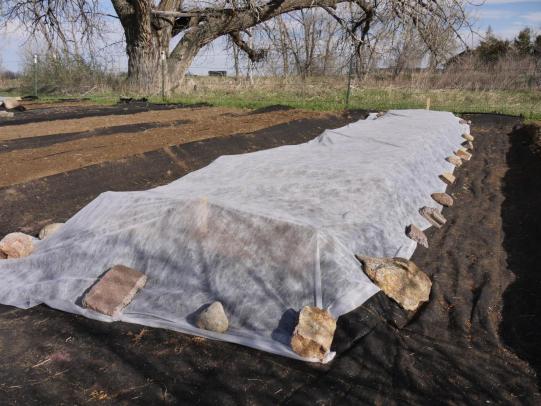
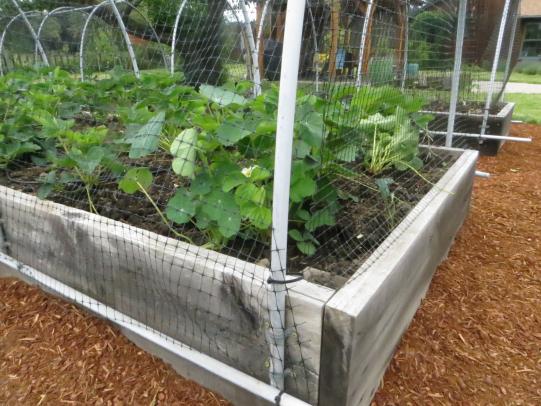
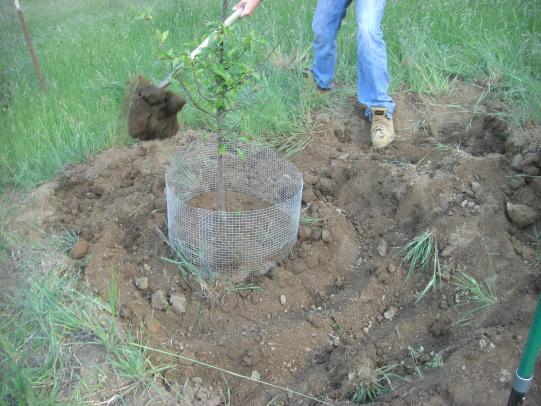
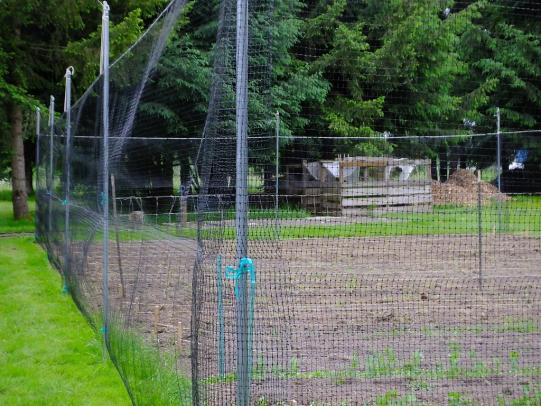
Más BARRERAS PARA PROTEGER LAS PLANTAS
- Las cubiertas de hileras evitan que las plagas y los polinizadores lleguen a las flores. Retire las cubiertas de cultivos como tomates y calabazas cuando comience la floración.
- Revise las plantas debajo de las cubiertas de hileras para asegurarse de que no haya plagas debajo de la cubierta.
- Use redes y cercas para mantener a los animales alejados de las plantas, según sea necesario.

Weston Miller, Oregon State University
Signe Danler, Oregon State University
"Image" by Danny Thorpe is licensed under CC BY 2.0.

pcturner71, iStock
Weston Miller, Oregon State University
"Deer Fence landscape" by Linda, Fortuna future is licensed under CC BY-NC 2.0.
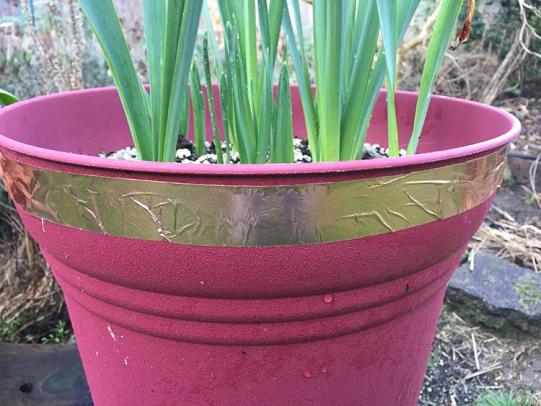
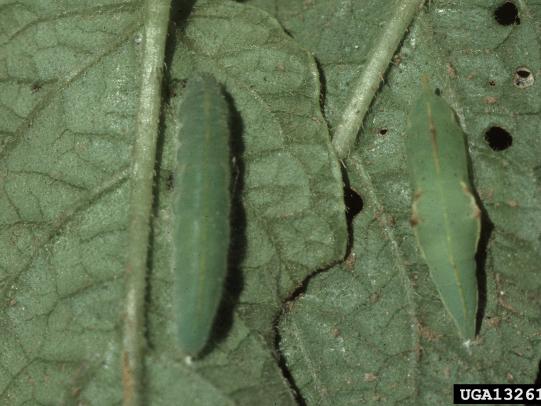
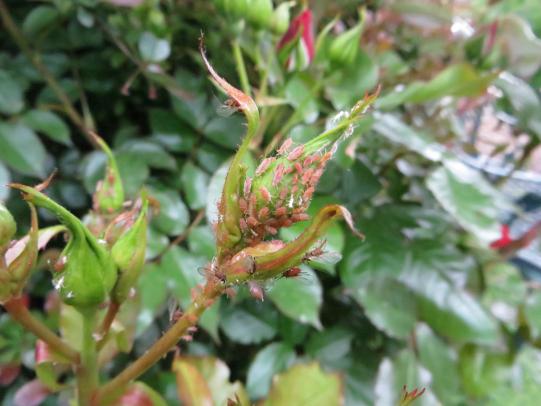
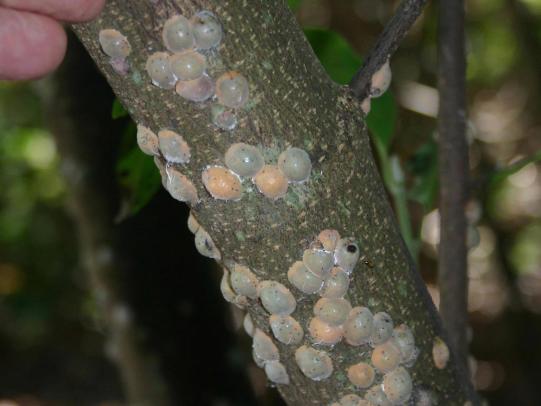
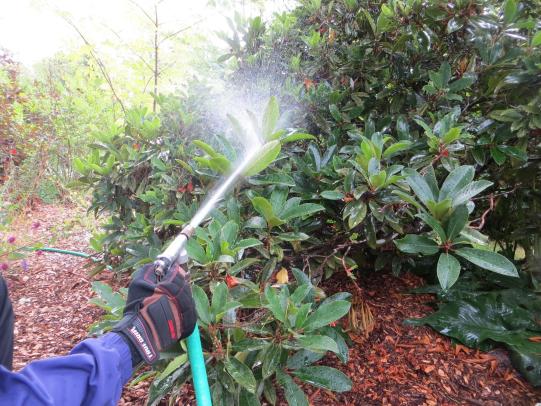
CONTROL MANUAL, TRAMPAS Y PULVERIZADORES DE AGUA
- Elimine manualmente las plagas de insectos de las plantas deseadas. Busque pulgones y larvas de insectos en el envés de las hojas.
- Atrape babosas y caracoles con trampas de cerveza o de madera.
- Utilice un pulverizador de agua a alta presión para eliminar las plagas de insectos de las plantas.
Whitney Cranshaw, Colorado State University, Bugwood.org
Whitney Cranshaw, Colorado State University, Bugwood.org
William Fountain, University of Kentucky, Bugwood.org
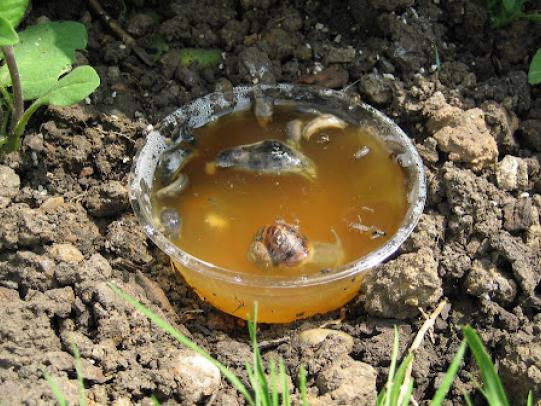
"Beer Trap Success" by SteveR- is marked with CC BY 2.0
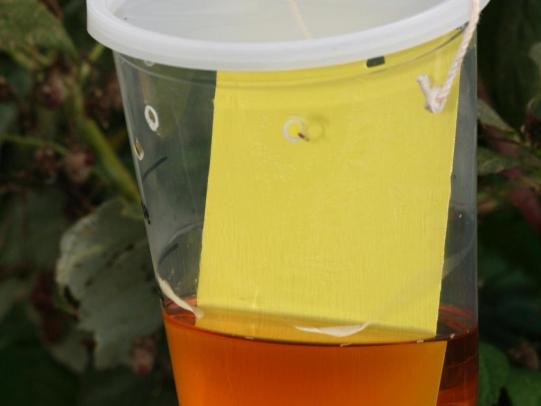
Hannah Burrack, North Carolina State University, Bugwood.org
Signe Danler, Oregon State University
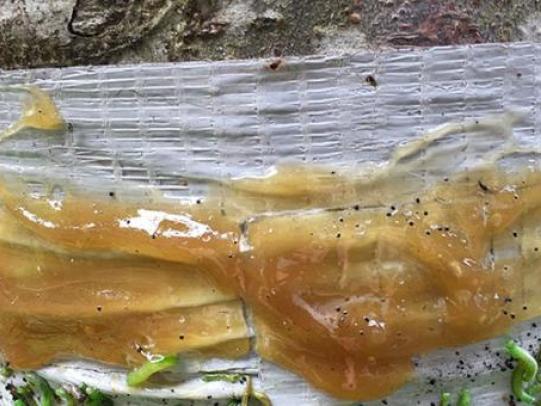
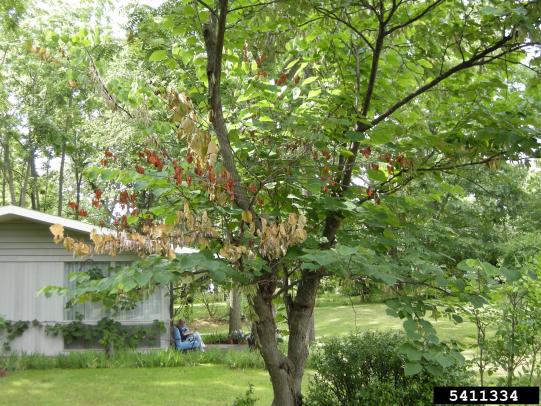
PODE LAS RAMAS ENFERMAS Y LOS DAÑOS CAUSADOS POR INSECTOS
Elimine los daños causados por insectos y las ramas enfermas de árboles y arbustos. La poda evita que las plagas de insectos y los problemas de enfermedades se propaguen.
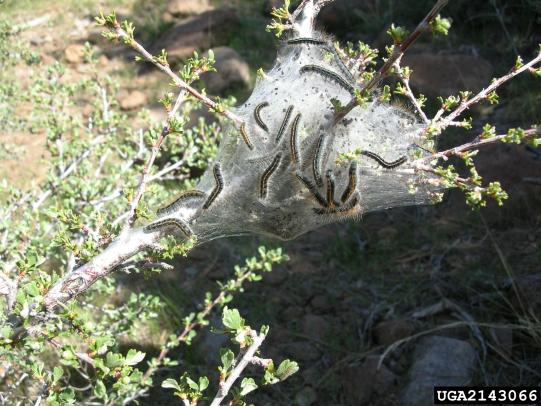
Brytten Steed, USDA Forest Service, Bugwood.org
Mary Ann Hansen, Virginia Polytechnic Institute and State University, Bugwood.org
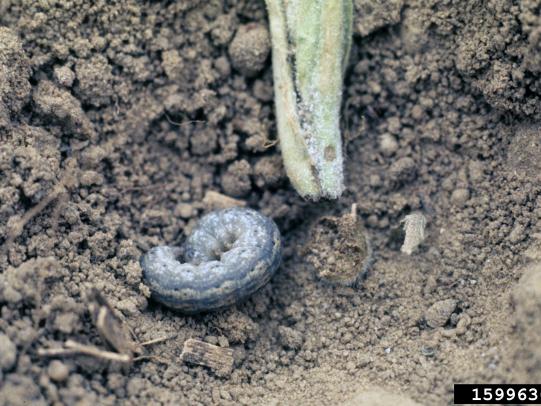
LABRAR para interrumpir los ciclos de vida de los insectos del suelo
- Labrar el suelo para interrumpir las plagas transmitidas por el suelo, como babosas y caracoles, gusanos cortadores y sínfilos.
- La labranza rotativa interrumpe el ciclo de vida de las plagas que habitan en el suelo. Las mata, las entierra o las expone a los depredadores.
- Sin embargo, la labranza repetida puede dañar la estructura del suelo y los organismos beneficiosos. La labranza puede hacer que las semillas de malezas salgan a la superficie, lo que crea otro problema.
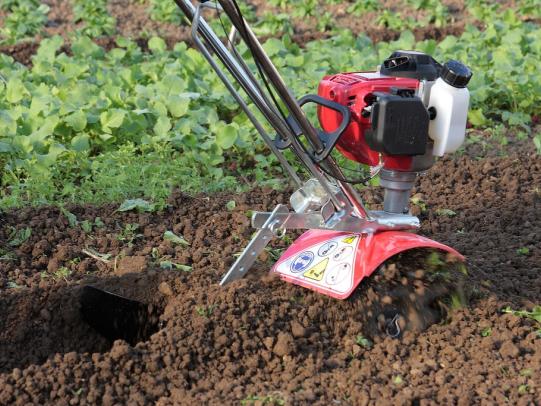
"Mantis Tiller" by David Goose / MSI is licensed under CC BY-NC-SA 2.0.
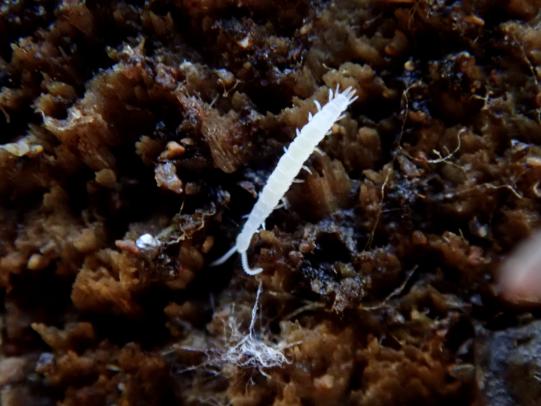
"Symphylan" by Brenda Dobbs is licensed under CC BY-NC 2.0.
John C. French Sr., Retired, Universities:Auburn, GA, Clemson and U of MO, Bugwood.org
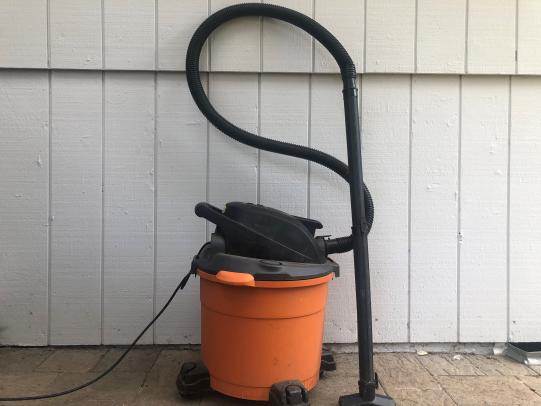
Pase la aspiradora para eliminar los insectos molestos de sus estructuras
Se sabe que las chinches apestosas marmóreas y las chinches apestosas marmóreas marrones (BMSB) se congregan en las estructuras. A veces, una gran cantidad de insectos se reúnen dentro y alrededor de las estructuras desde el otoño hasta principios de la primavera. Los insectos buscan lugares protegidos para pasar el invierno.

Kansas Department of Agriculture, Bugwood.org
Weston Miller, Oregon State University
Contenido proporcionado por el editor Weston Miller y los escritores Signe Danler y J. Jeremiah Mann.
Revisión por pares del Departamento de Horticultura de la OSU.


Non-Chemical Pest Control References
PNW Disease Management Handbook Cultivar Susceptibility Tables
Oregon State University
Selecting, Planting, and Caring for a New Tree
Oregon State University
Mulching Woody Ornamentals with Organic Materials
Oregon State University
Crop Rotation: An Essential Part of Planning a Home Garden
Alabama Cooperative Extension System